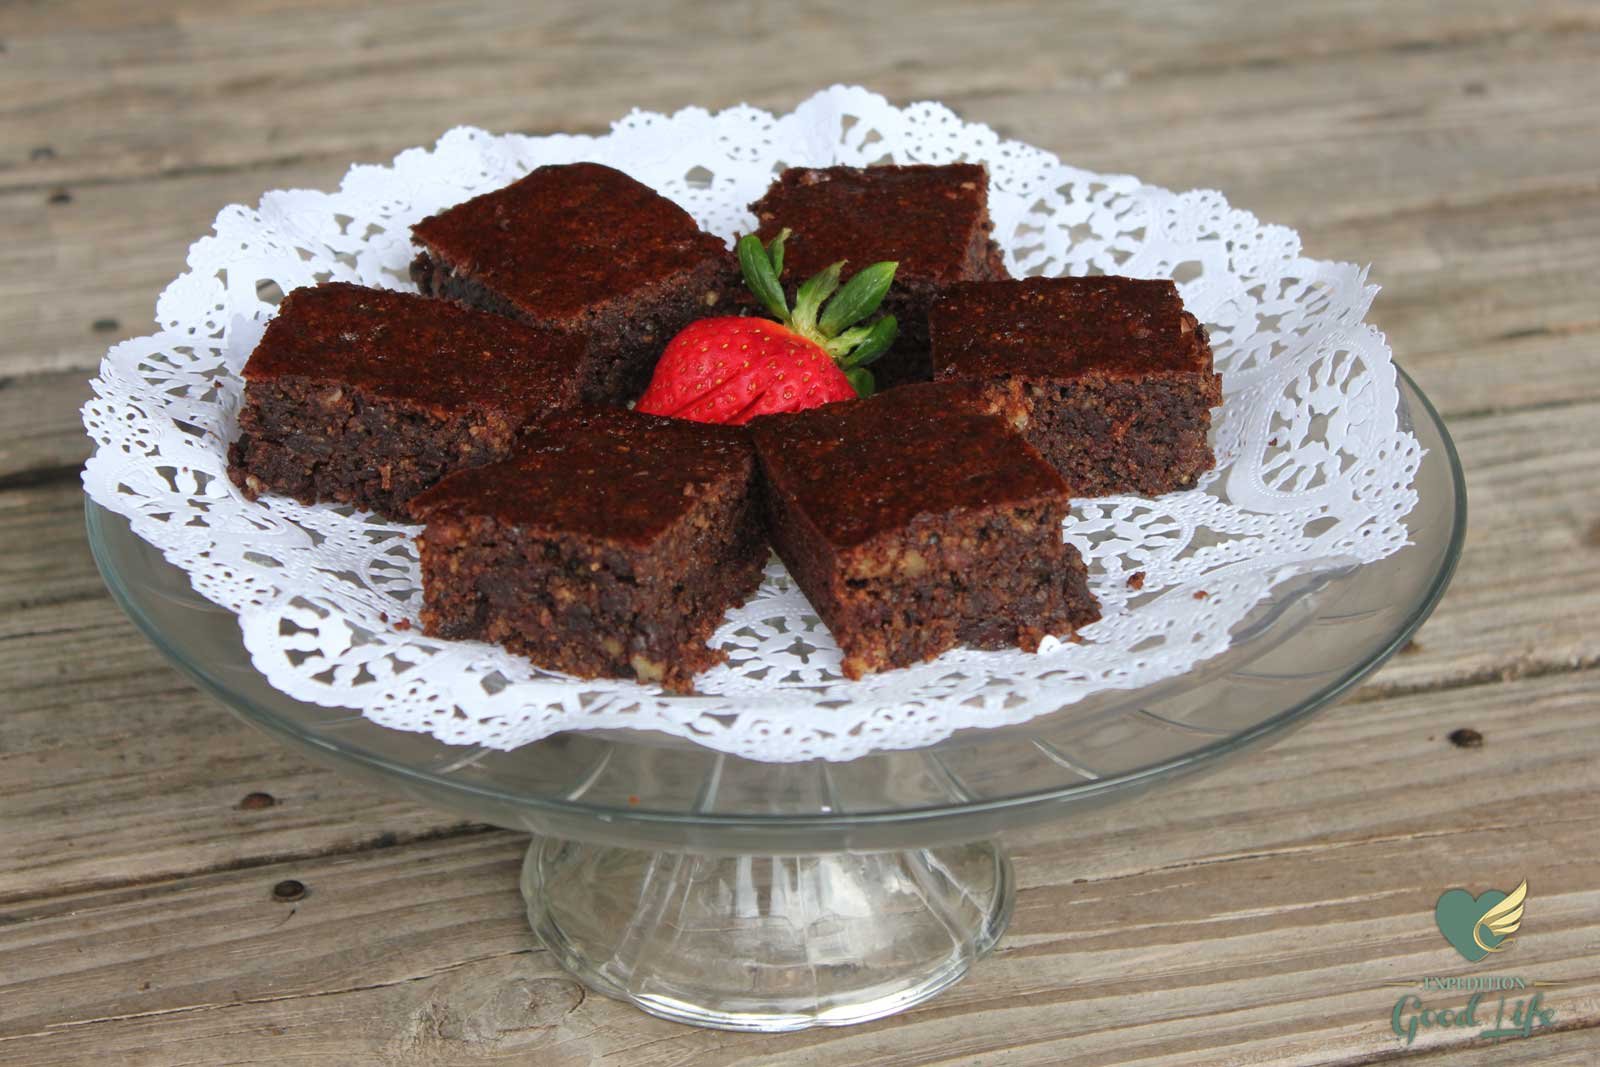
Mimi’s Paleo Brownies
[vc_row][vc_column width=”1/1″][ultimate_heading main_heading=”About this Recipe” alignment=”left” main_heading_font_family=”font_family:|font_call:”][/ultimate_heading][vc_column_text]This is a recipe I’ve been working on for months to get right. For those of you who do not know, our family’s eating lifestyle is Paleo. Since I’m new to cooking with these unusual sweeteners and flours, I never knew existed, it’s been a completely different learning curve. I can no longer go to my pantry, pull out white sugar, white flour and start cooking. 🙁 I’m using ingredients like almond flour and Erythritol a sugar substitute, trying to make them work in old favorite recipes, so they will taste similar to the recipes my family loves. I think I’ve now got the brownies the way we like them.
In this recipe I used five Medjool Dates to sweeten and make the brownies chewy. I added one quarter cup of Erythritol Sugar and one quarter cup organic maple syrup to sweeten them. You can read more about Erythritol Sugar in an article I wrote on, “My favorite Sugar Substitutes’.” Using two kinds of flour; almond and hazelnut gave it the texture I wanted. Note that many of the recipes ingredients may need to be purchased at a Whole Foods Market or a similar type market in your area.
Please let me know how the brownies turn out for you and how you may have tweaked them for your family.
Until next time, enjoy the good life!
Exploring Life’s Possibilities[/vc_column_text][vc_raw_html]JTNDcCUyMGNsYXNzJTNEJTIyc2lnbmF0dXJlJTIyJTNFTWltaSUzQyUyRnAlM0UlMjA=[/vc_raw_html][/vc_column][/vc_row][vc_row][vc_column width=”1/2″][ultimate_heading main_heading=”What You Need” alignment=”left” main_heading_font_family=”font_family:|font_call:”][/ultimate_heading][vc_column_text]
Tools you will need to assemble:
- Measuring cups and spoons
- An eight by eight inch baking dish
- A food processor
- Spatula
- Medium size mixing bowl
- Wisk
- Mallet (or something to breakup nuts and chocolate)
- Plastic bag
- Small amount of wax paper (for buttering pan)
- Knife
- Optional: Varies sizes of nesting bowls for ingredient
Need to Know:
- Oven temperature of 350 degrees
- Approximate prep time of fifteen to twenty minutes
- Approximate cook time of twenty to thirty-five minutes
- Servings of exactly sixteen (four across and four down)
[/vc_column_text][/vc_column][vc_column width=”1/2″][vc_single_image image=”554″ border_color=”grey” img_link_target=”_self” img_size=”full”][/vc_column][/vc_row][vc_row][vc_column width=”1/2″][vc_column_text]
Ingredients:
Dry Ingredient
- ½ Cup Hazelnut Flour (Bob’s Red Mill)
- ½ Cup Almond Flour (Bob’s Red Mill)
- ¼ Cup Erythritol Sugar
- ¼ Teaspoon Baking Soda
- Pinch of Salt
Wet Ingredients
- 1 Teaspoon Organic Madagascar Vanilla
- Three Eggs
- ¼ Cup organic Maple Syrup
- ½ Cup Coconut Oil
Extra’s and Add Ins
- 4oz. Unsweetened Chocolate (cut into pieces)
- Six Medjool Dates (pitted and chopped)
- ½ to ¾ Chopped Pecans
- ¼ to ½ Teaspoon Butter
[/vc_column_text][/vc_column][vc_column width=”1/2″][vc_single_image image=”555″ border_color=”grey” img_link_target=”_self” img_size=”full”][/vc_column][/vc_row][vc_row][vc_column width=”1/1″][ultimate_heading main_heading=”The Process” alignment=”left” main_heading_font_family=”font_family:|font_call:”][/ultimate_heading][/vc_column][/vc_row][vc_row][vc_column width=”1/3″][vc_single_image image=”525″ border_color=”white” img_link_target=”_self” img_size=”medium” alignment=”center” style=”vc_box_outline”][/vc_column][vc_column width=”2/3″][ultimate_spacer height=”0″ height_on_tabs=”20″ height_on_tabs_portrait=”20″ height_on_mob_landscape=”20″ height_on_mob=”20″][vc_column_text]First, grease the 8×8 inch pan with butter and set aside. Using a small piece of wax paper will make this process easier and less messy.[/vc_column_text][/vc_column][/vc_row][vc_row][vc_column width=”1/3″][vc_single_image image=”540″ border_color=”white” img_link_target=”_self” img_size=”medium” alignment=”center” style=”vc_box_outline”][/vc_column][vc_column width=”2/3″][ultimate_spacer height=”0″ height_on_tabs=”20″ height_on_tabs_portrait=”20″ height_on_mob_landscape=”20″ height_on_mob=”20″][vc_column_text]Place all wet ingredients in a medium mixing bowl and whisk. Set ingredients aside.[/vc_column_text][/vc_column][/vc_row][vc_row][vc_column width=”1/3″][vc_single_image image=”527″ border_color=”white” img_link_target=”_self” img_size=”medium” alignment=”center” style=”vc_box_outline”][/vc_column][vc_column width=”2/3″][ultimate_spacer height=”0″ height_on_tabs=”20″ height_on_tabs_portrait=”20″ height_on_mob_landscape=”20″ height_on_mob=”20″][vc_column_text]Put all dry ingredients in food processor and pulse.[/vc_column_text][/vc_column][/vc_row][vc_row][vc_column width=”1/3″][vc_single_image image=”528″ border_color=”white” img_link_target=”_self” img_size=”medium” alignment=”center” style=”vc_box_outline”][/vc_column][vc_column width=”2/3″ el_class=”Crush chololate with a malate. “][ultimate_spacer height=”0″ height_on_tabs=”20″ height_on_tabs_portrait=”20″ height_on_mob_landscape=”20″ height_on_mob=”20″][vc_column_text]Crush chocolate with wood mallet.[/vc_column_text][/vc_column][/vc_row][vc_row][vc_column width=”1/3″][vc_single_image image=”541″ border_color=”white” img_link_target=”_self” img_size=”medium” alignment=”center” style=”vc_box_outline”][/vc_column][vc_column width=”2/3″][ultimate_spacer height=”0″ height_on_tabs=”20″ height_on_tabs_portrait=”20″ height_on_mob_landscape=”20″ height_on_mob=”20″][vc_column_text]Here is the consistency you want for the chocolate.[/vc_column_text][/vc_column][/vc_row][vc_row][vc_column width=”1/3″][vc_single_image image=”542″ border_color=”white” img_link_target=”_self” img_size=”medium” alignment=”center” style=”vc_box_outline”][/vc_column][vc_column width=”2/3″][ultimate_spacer height=”0″ height_on_tabs=”20″ height_on_tabs_portrait=”20″ height_on_mob_landscape=”20″ height_on_mob=”20″][vc_column_text]Next put the cut up chocolate pieces in the processor and pulse until ingredients are well mixed. Now turn the processor on high until ingredients are the consistency of fine grain.[/vc_column_text][/vc_column][/vc_row][vc_row][vc_column width=”1/3″][vc_single_image image=”543″ border_color=”white” img_link_target=”_self” img_size=”medium” alignment=”center” style=”vc_box_outline”][/vc_column][vc_column width=”2/3″][ultimate_spacer height=”0″ height_on_tabs=”20″ height_on_tabs_portrait=”20″ height_on_mob_landscape=”20″ height_on_mob=”20″][vc_column_text]De-pit your dates.[/vc_column_text][/vc_column][/vc_row][vc_row][vc_column width=”1/3″][vc_single_image image=”544″ border_color=”white” img_link_target=”_self” img_size=”medium” alignment=”center” style=”vc_box_outline”][/vc_column][vc_column width=”2/3″][ultimate_spacer height=”0″ height_on_tabs=”20″ height_on_tabs_portrait=”20″ height_on_mob_landscape=”20″ height_on_mob=”20″][vc_column_text]The dates will go in next and follow the same process as in direction (3).[/vc_column_text][/vc_column][/vc_row][vc_row][vc_column width=”1/3″][vc_single_image image=”545″ border_color=”white” img_link_target=”_self” img_size=”medium” alignment=”center” style=”vc_box_outline”][/vc_column][vc_column width=”2/3″][ultimate_spacer height=”0″ height_on_tabs=”20″ height_on_tabs_portrait=”20″ height_on_mob_landscape=”20″ height_on_mob=”20″][vc_column_text]Next place the wet ingredients in the processor on low until well blended.[/vc_column_text][/vc_column][/vc_row][vc_row][vc_column width=”1/3″][vc_single_image image=”546″ border_color=”white” img_link_target=”_self” img_size=”medium” alignment=”center” style=”vc_box_outline”][/vc_column][vc_column width=”2/3″][ultimate_spacer height=”0″ height_on_tabs=”20″ height_on_tabs_portrait=”20″ height_on_mob_landscape=”20″ height_on_mob=”20″][vc_column_text]Crush pecans in a Ziploc bag with wooden mallet.[/vc_column_text][/vc_column][/vc_row][vc_row][vc_column width=”1/3″][vc_single_image image=”547″ border_color=”white” img_link_target=”_self” img_size=”medium” alignment=”center” style=”vc_box_outline”][/vc_column][vc_column width=”2/3″][ultimate_spacer height=”0″ height_on_tabs=”20″ height_on_tabs_portrait=”20″ height_on_mob_landscape=”20″ height_on_mob=”20″][vc_column_text]Pecans consistency should look like this.[/vc_column_text][/vc_column][/vc_row][vc_row][vc_column width=”1/3″][vc_single_image image=”548″ border_color=”white” img_link_target=”_self” img_size=”medium” alignment=”center” style=”vc_box_outline”][/vc_column][vc_column width=”2/3″][ultimate_spacer height=”0″ height_on_tabs=”20″ height_on_tabs_portrait=”20″ height_on_mob_landscape=”20″ height_on_mob=”20″][vc_column_text]Now place the nuts in the bowl of the processor and fold the nuts into the mix. You may want to remove the center blade if your food processor allows you to, because I find the blade gets in the way.[/vc_column_text][/vc_column][/vc_row][vc_row][vc_column width=”1/3″][vc_single_image image=”549″ border_color=”white” img_link_target=”_self” img_size=”medium” alignment=”center” style=”vc_box_outline”][/vc_column][vc_column width=”2/3″][ultimate_spacer height=”0″ height_on_tabs=”20″ height_on_tabs_portrait=”20″ height_on_mob_landscape=”20″ height_on_mob=”20″][vc_column_text]Place the mixed ingredients in the pan and bake.[/vc_column_text][/vc_column][/vc_row][vc_row][vc_column width=”1/3″][vc_single_image image=”550″ border_color=”white” img_link_target=”_self” img_size=”medium” alignment=”center” style=”vc_box_outline”][/vc_column][vc_column width=”2/3″][ultimate_spacer height=”0″ height_on_tabs=”20″ height_on_tabs_portrait=”20″ height_on_mob_landscape=”20″ height_on_mob=”20″][vc_column_text]Check brownies after twenty minutes and then every five until done. Use a toothpick placed into mixture to check doneness (toothpick will be brown, but no longer wet when brownies are done), and watch outer edge of brownie that they do not get to brown. Every stove cooks different and my brownies take thirty minutes to cook.[/vc_column_text][/vc_column][/vc_row]

