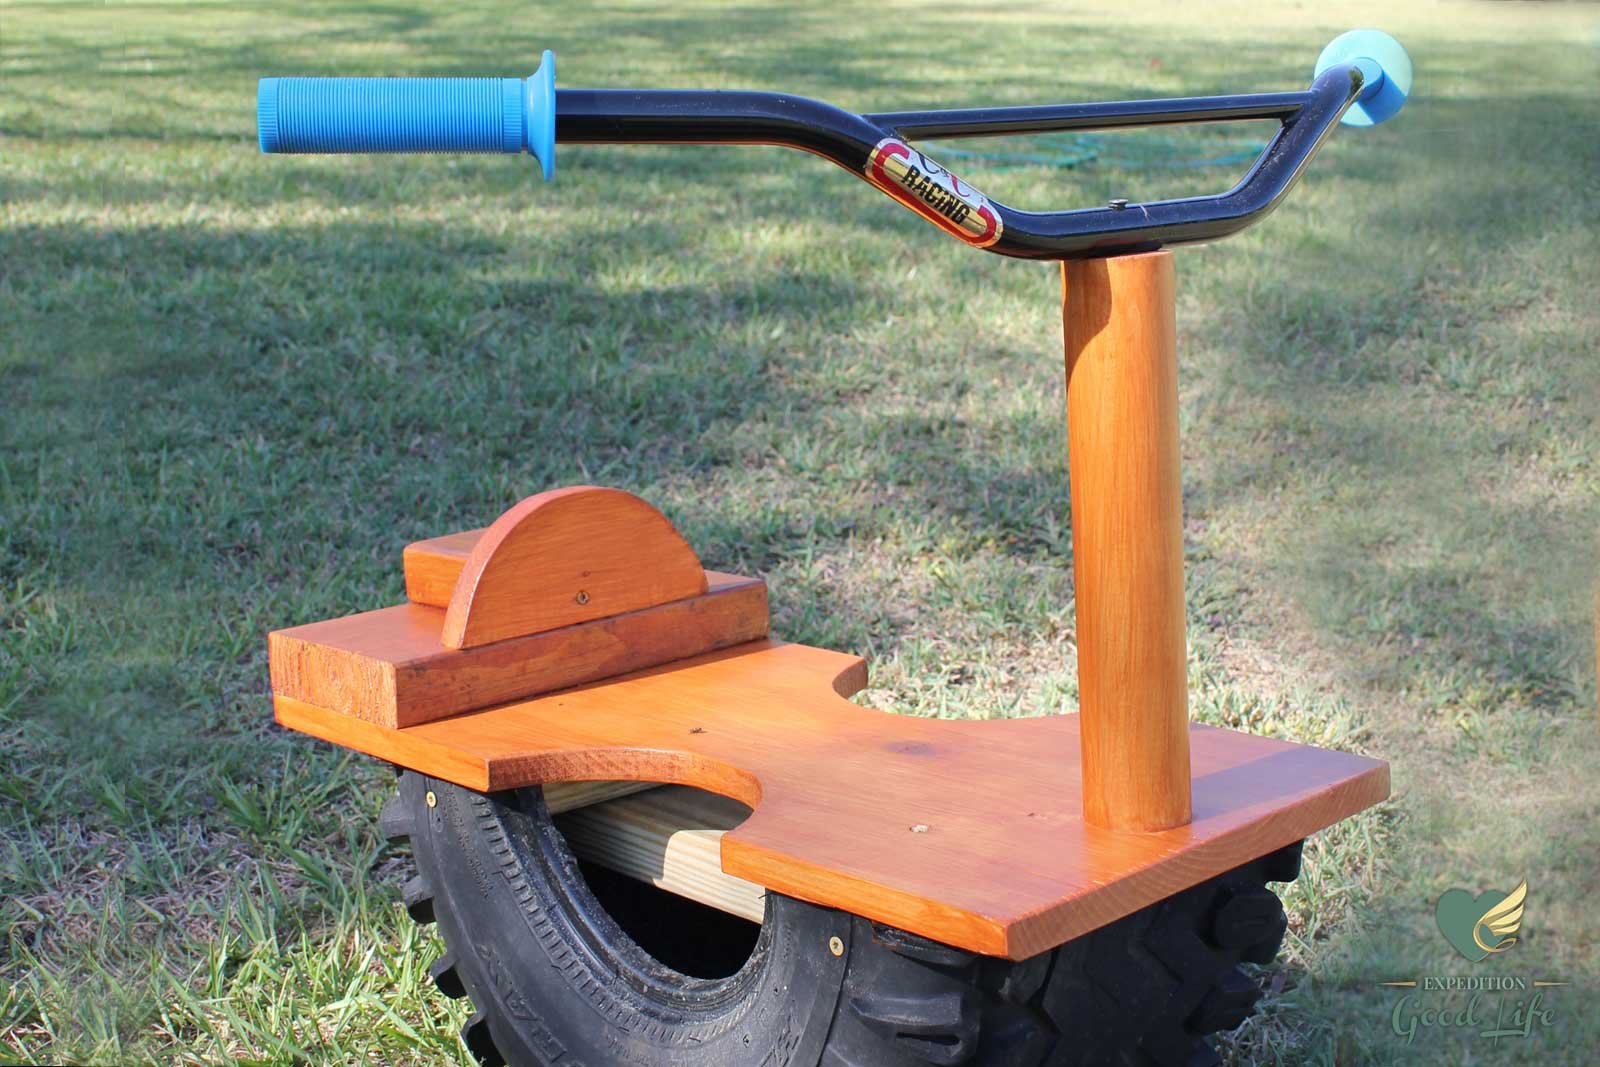
Build a Motorcycle Tire Rocker
[vc_row][vc_column width=”2/3″][vc_single_image image=”450″ border_color=”grey” img_link_target=”_self” img_size=”full”][/vc_column][vc_column width=”1/3″][vc_column_text]We started this project when we decided to make Tristan my son a playhouse for his 2nd Birthday. Tristan loves all things that go Vroom. So we chose to theme the playhouse a cars theme. We strongly believe in recycling or ‘upcycling’ when possible as well as being avid do It Yourselfers. So, putting together the playhouse we used recycled materials like license plates, car door handles, mirrors, and one of the materials that was obvious to use was old tires, for a climbing wall, swings, so on. I was taking a much needed lemon water break on the job one day (I am an essential oil freak) and was thinking wouldn’t it be cute to make a rocker out of one of the left over tires? One thing lead to another and viola the motorcycle tire rocker was born. When making your rocker try to remember that your material’s sizes and weight will be different then ours, so I tried to keep the directions basic to allow you to adjust things according to your found recycled treasures. I would love to hear your feed back on this project please let me know, how your version turns out? What extra goodies did you find and add? Maybe you found a personalized license plate? Maybe you painted it a funky cool color and to match a play set? Whatever it is feel free to share!
Until next time, enjoy the good life,
Woman on the Journey[/vc_column_text][vc_raw_html]JTNDcCUyMGNsYXNzJTNEJTIyc2lnbmF0dXJlJTIyJTNFQW1hbmRhJTIwSmVhbiUzQyUyRnAlM0UlMjA=[/vc_raw_html][/vc_column][/vc_row][vc_row][vc_column width=”1/2″][vc_column_text]
Materials:
- Tire
- Bike or sports motorcycle handle bars
- Pressure treated wood (1- 2 by 4, 1 piece of plank wood 2 inches to 3 inches longer than tire on both sides, and 1 piece of 2 by 6) or wood that you give coating to
- Wood finish
- Thick wood dowel (about 2 inches thick/wide)
- Washer size of dowel width
- 2 Exterior wood screws 3 inches long
- A box of 2 ½ inch exterior wood screws (or approximately 18 to 20 screws)
[/vc_column_text][/vc_column][vc_column width=”1/2″][vc_column_text]
Tools:
- Electric Sander or by hand sand paper
- Sawzall
- Jig saw
- Paint brush
- Hand Drill
[/vc_column_text][/vc_column][/vc_row][vc_row][vc_column width=”1/2″][vc_column_text]
Steps:
- Cut tire in half with Sawzall (smells pretty bad FYI)
- Make an ‘I’ Brace with 2 by 4 wood, cut 2 pieces the width of the tire, and one to the length of the top inside of the tire. Place together with screws.
- Place brace inside tire at the top of tire and screw in at the sides on each side of the tire.
- Cut ½ circles out of the plank board with a jig saw on each side in the middle of the board
- Set aside one of the ½ circles for seat back to motorcycle.
- Cut 2 by 6 to fit width of plank boards back end (for seat of motorcycle).
- Cut a small end piece to motorcycle seat from 2 by 4 for the finishing counter balance to the bars of bike. (You may have to play with these sizes to get the correct weight for your handles).
- Sand and paint all wood pieces with finish, including dowel (used cedar looking finish). This may take a few coats to complete. You can buy a finish with a sealer as well. Let fully dry.
- Screw the seat plank wood onto ‘I’ Brace (a couple screws each end).
- Screw half circle onto the 2 by 6 at one edge from under the 2 by 6 to hide screws
- Do the same with counter balance 2 by 4.
- Last for the seat screw on the completed seat back at the back of motorcycle rocker with the half circle on seat side.
- For the dowel handle bar, drill a hole in the center of dowel top, also in the center of the bottom of the metal bike handles. Follow this by placing a 3inch exterior wood screw through both holes to attach.
- Place your little munchkin on the current rocker and put the handle bar piece on the rocker to get a good idea of where to cut the dowel at bottom to get the perfect fit. Mark with pencil where you wish to cut (remember munchkins grow fast so leave a bit more room). Then cut.
- Drill a hole at the bottom of the now cut dowel in the center. Place the handlebars on the front or rocker and align where you wish them to line up, then mark the bottom of the plank board where you need to drill hole to align with pencil. Drill hole. Then place dowel with handlebars on the plank, and place washer on bottom of plank board with screw, drill in 3inch exterior wood screw from the bottom up.
- Let your munchkin rock in roll … vroom, vroom.
[/vc_column_text][/vc_column][vc_column width=”1/2″][vc_gallery type=”flexslider_fade” interval=”3″ images=”452,453,454,455,456″ onclick=”link_image” custom_links_target=”_self” img_size=”full”][/vc_column][/vc_row]

